Print PDF documents from the LoginEKO Farming Software, Warehouse Module
Documents and notes can be printed from several sections within the Warehouse module of the farming software in various languages as a PDF. These PDF documents are sometimes required to be edited manually and shared with partners/customers. Below are sections from where the PDF documents can be printed when editing is required:
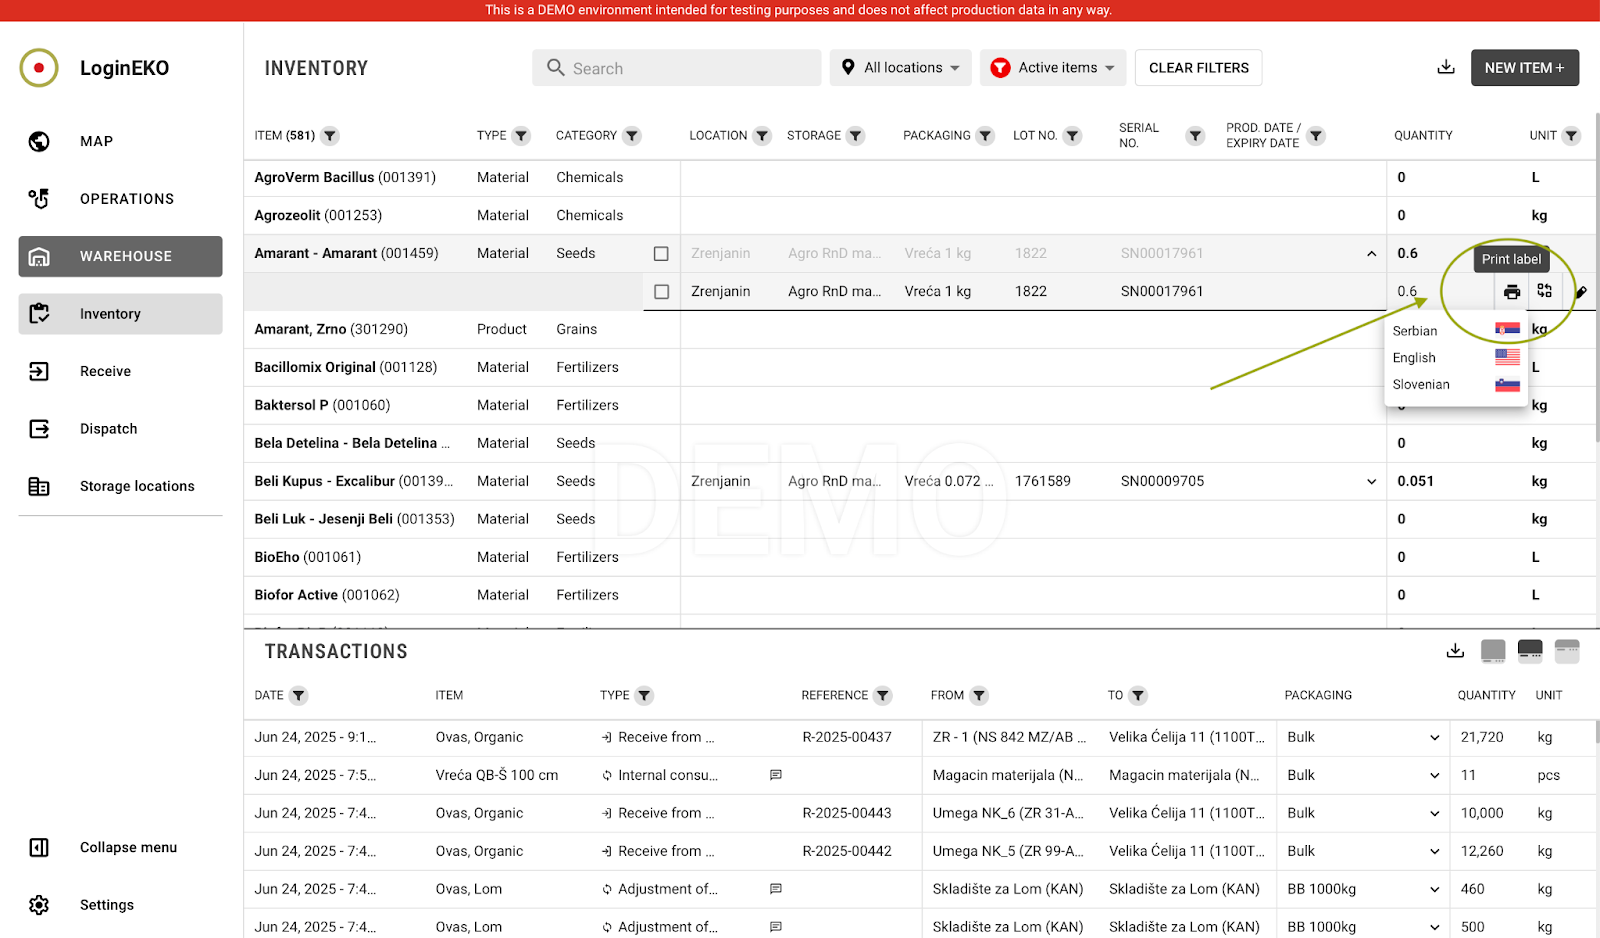
Inventory – Use the search function to find the relevant item, then click the printer icon at the end of the row. Select the preferred language to generate/print the PDF.
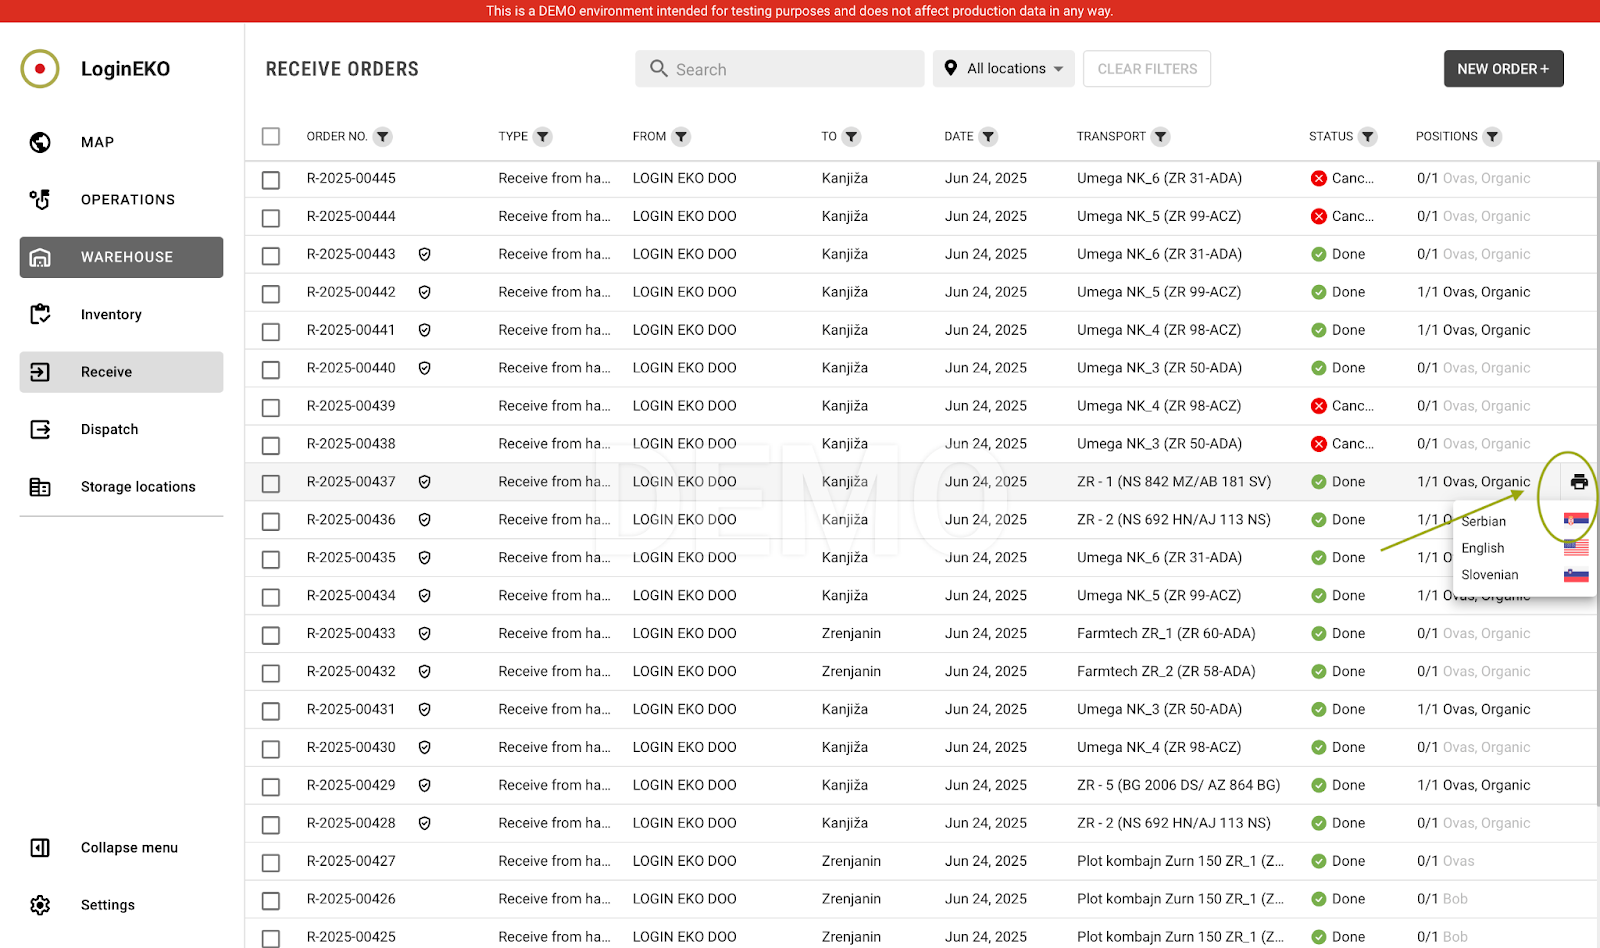
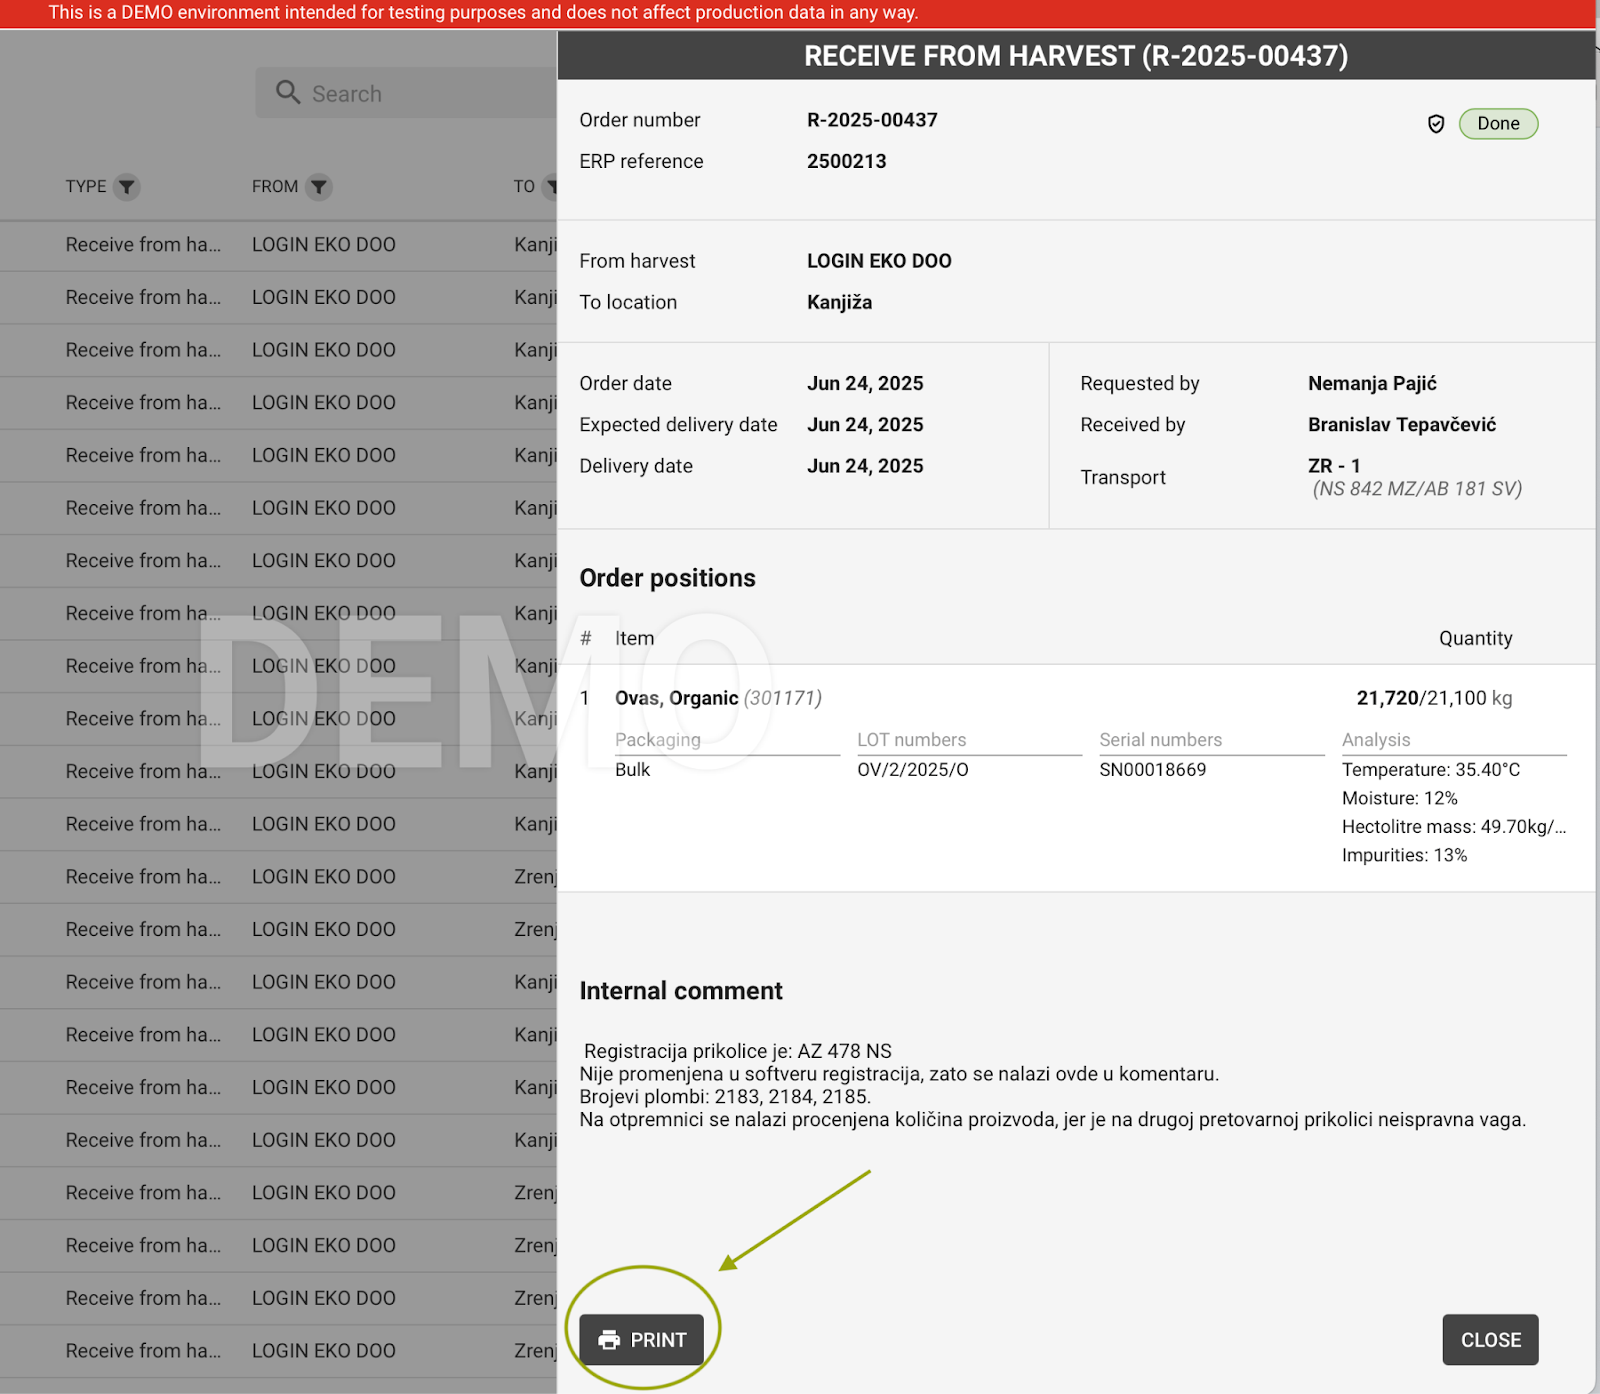
Receive – Locate the receive note using the search. Once selected, the print icon will appear at the end of the row, or if the details of the note are open in a new screen, the printer icon will appear at the bottom side of that window. Select desired language and generate/print the document as PDF.
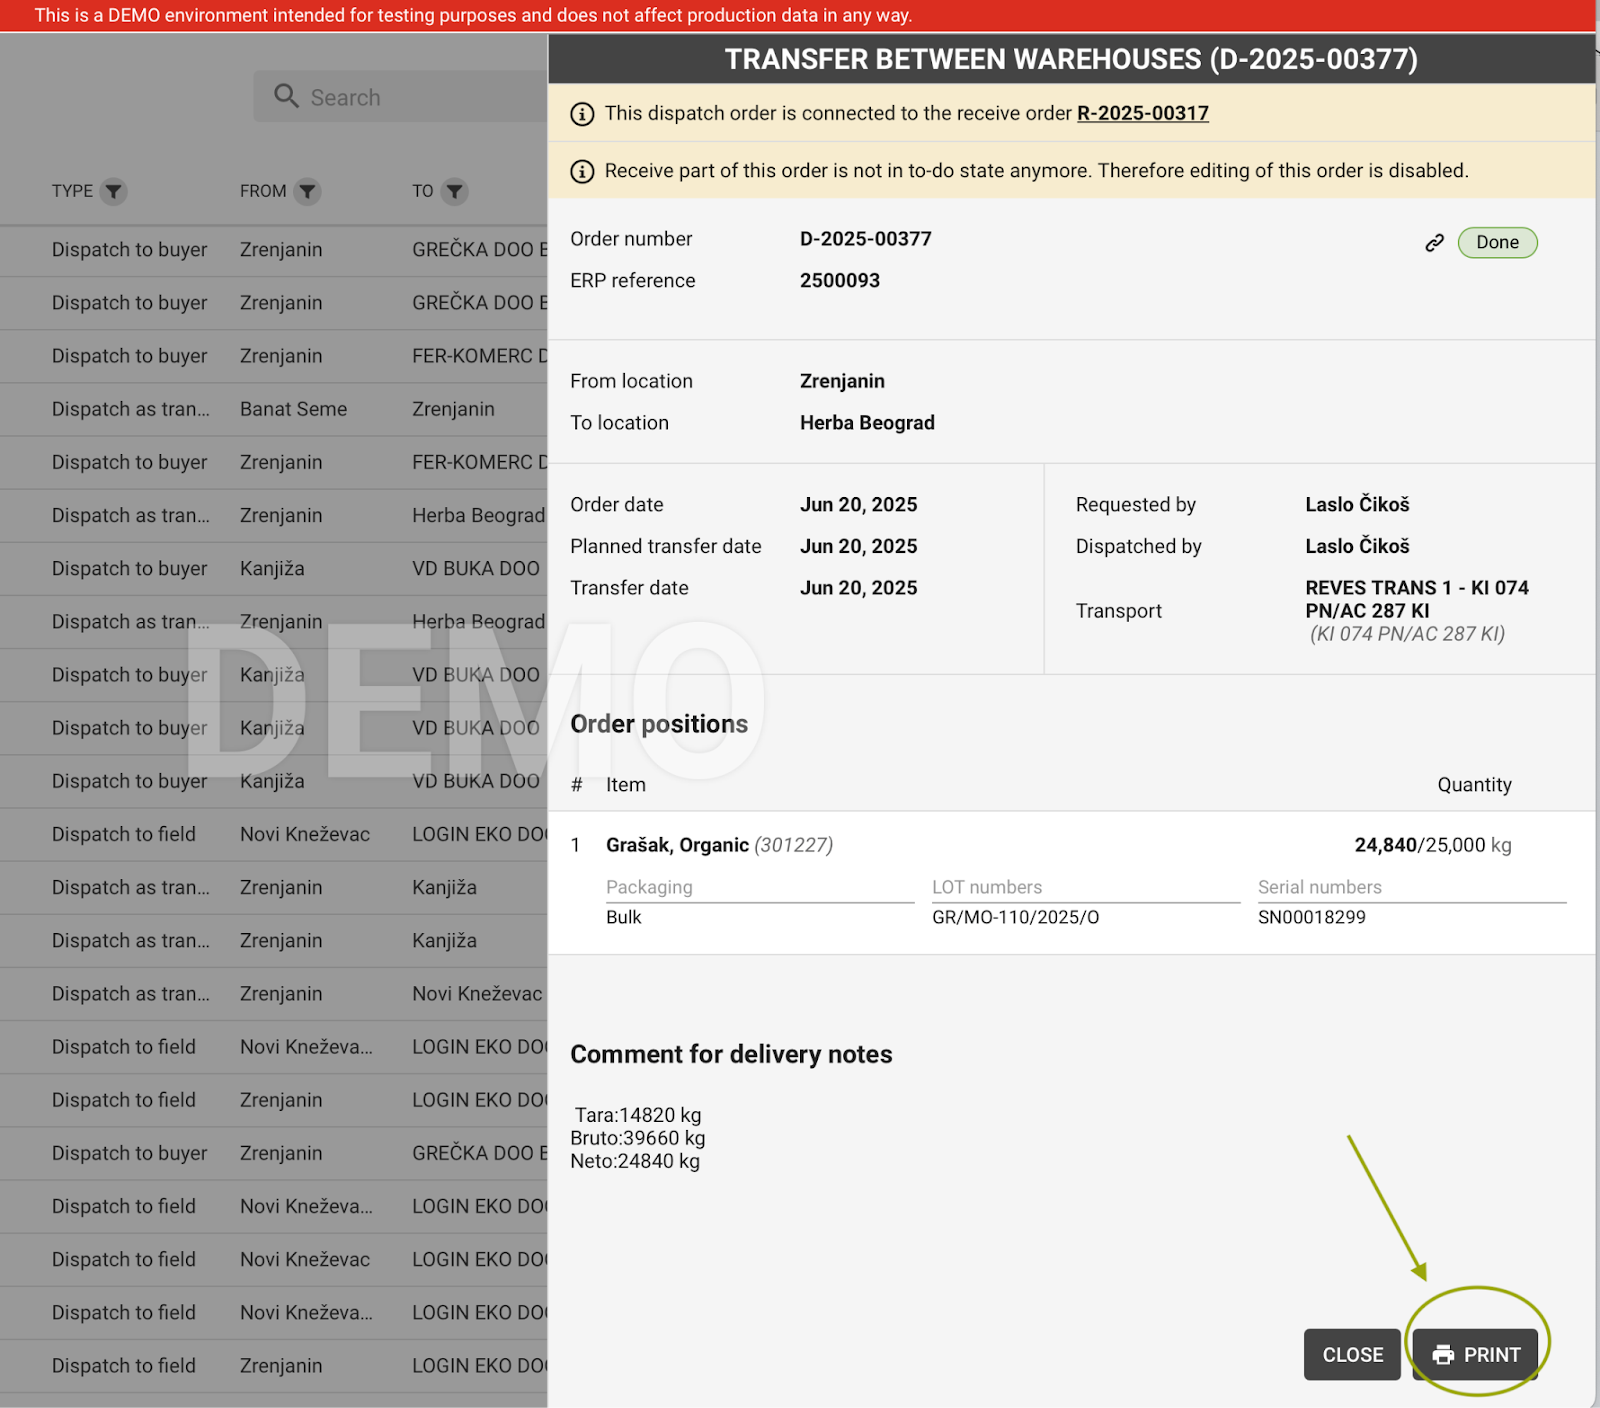
Dispatch – Similar to received notes, each dispatch order includes a print icon at the end of the row or at the bottom of the window showing details, which appear once the note is selected. Select desired language and generate/print the document as PDF.

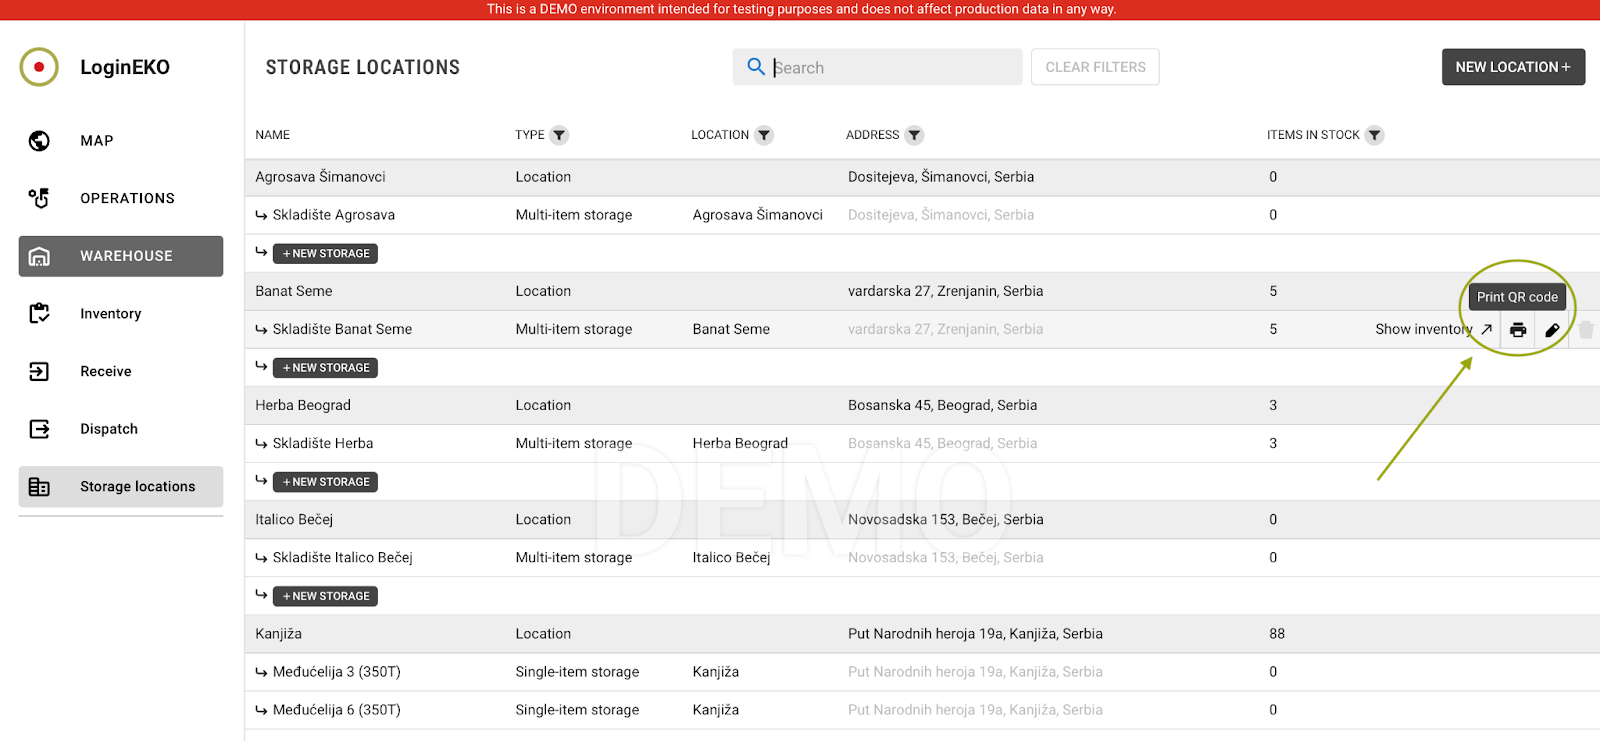
Storage locations – For each storage location, the print icon is available at the end of the row. There is no language to be selected for this option, as mainly the QR code is being printed.
In each case, the system will prompt you with a PDF, which can be downloaded for further editing.
The demo environment has the following URL where most of the notes/orders are up to date and available for printing:
https://app.demo.gcp.logineko.com/logineko/
Purpose of using tool Inkscape for PDFs editing/modification
Tenants over support channels sometimes need immediate support to edit a delivery note as an already printed PDF. Tool Inkscape, while it is a vector graphics tool (like Illustrator), performs well for basic PDF editing, particularly for:
Offline editing
Text correction
Object repositioning
And finally it is free and maintained open source
Inkscape has been tested across multiple cases of PDFs printed from the LoginEKO Farming Software and is suggested as suitable and effective for simple PDF editing, especially when tenants are awaiting for immediate support to edit delivery notes for example or other orders.
Download Inkscape
Latest stable version of Inkscape can be downloaded from the official site:
For macOS: Choose the dmg file matching the chip type (Intel or ARM64 – Apple M1/M2)
For Windows: Choose the installer version (EXE)
Current latest version (Jun 2025) per platform: https://inkscape.org/release/1.4.2/platforms/
Launch note: Window size case
When opening Inkscape, the main window may appear very small and be stuck in the upper-left corner of the screen, with the document zoomed out completely.
It is necessary to manually enlarge it before editing, either by selecting set to full screen or dragging to enlarge it from the upper side or left corner, as unfortunately the bottom part of the window cannot be always resized. This appears to be a known issue and shall hopefully be addressed in future releases. Optionally, window size could be forced through a launch script.
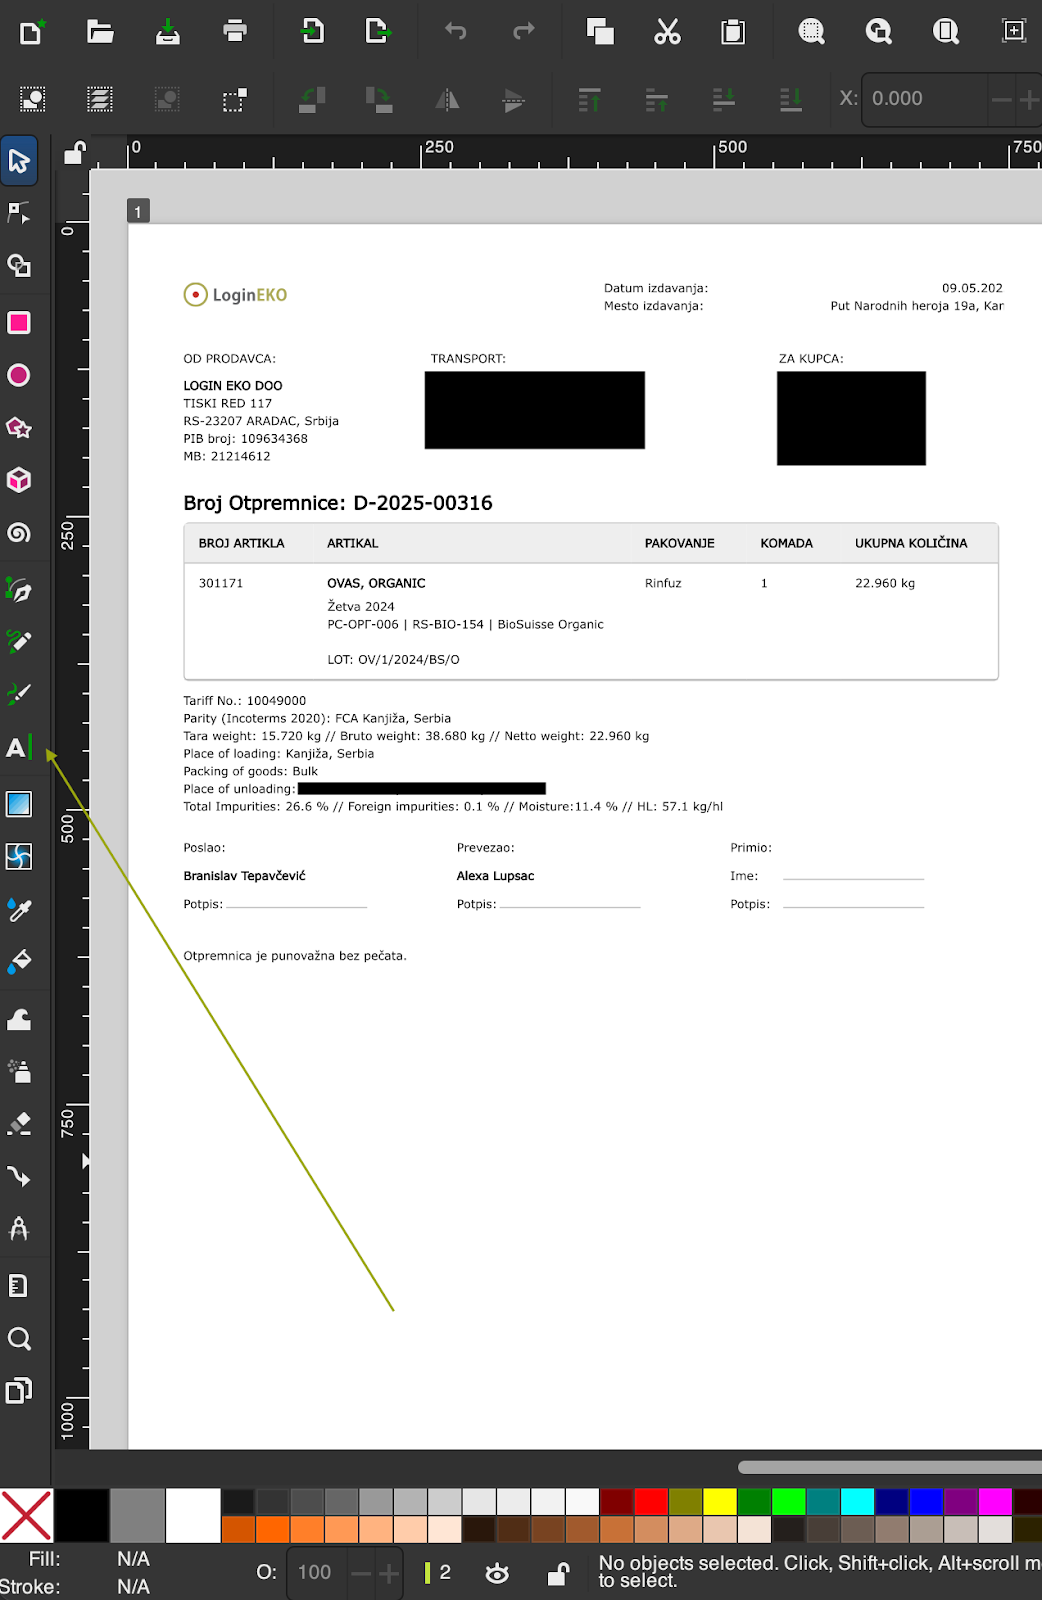
Opening a PDF in Inkscape (Important Font note)
Go to File > Open and choose your PDF
On import, a popup will appear where additional option about Fonts is available as a dropdown menu
Always select Substitute missing fonts (currently the second option from the drop down menu) as this substitutes unavailable fonts automatically. If this step is skipped, it may not be possible to modify the text in the document. Manual erasing and inserting the text is an option in this case.

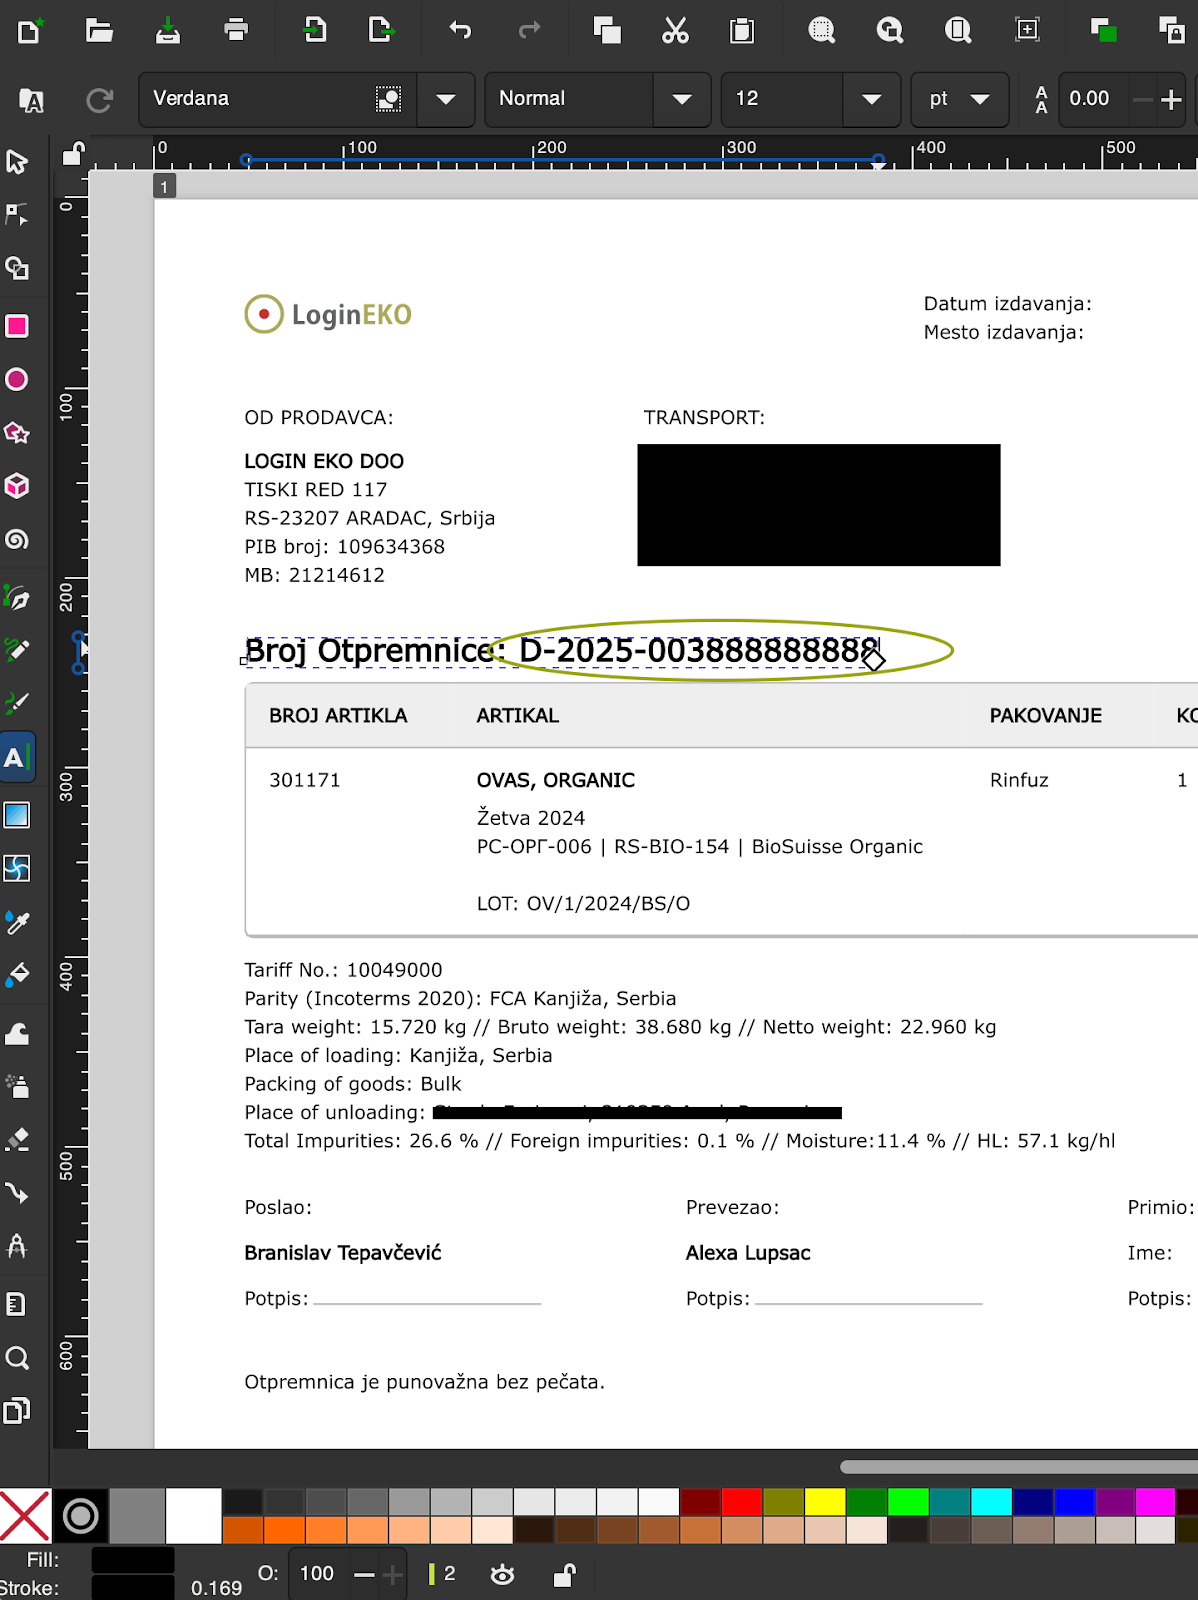
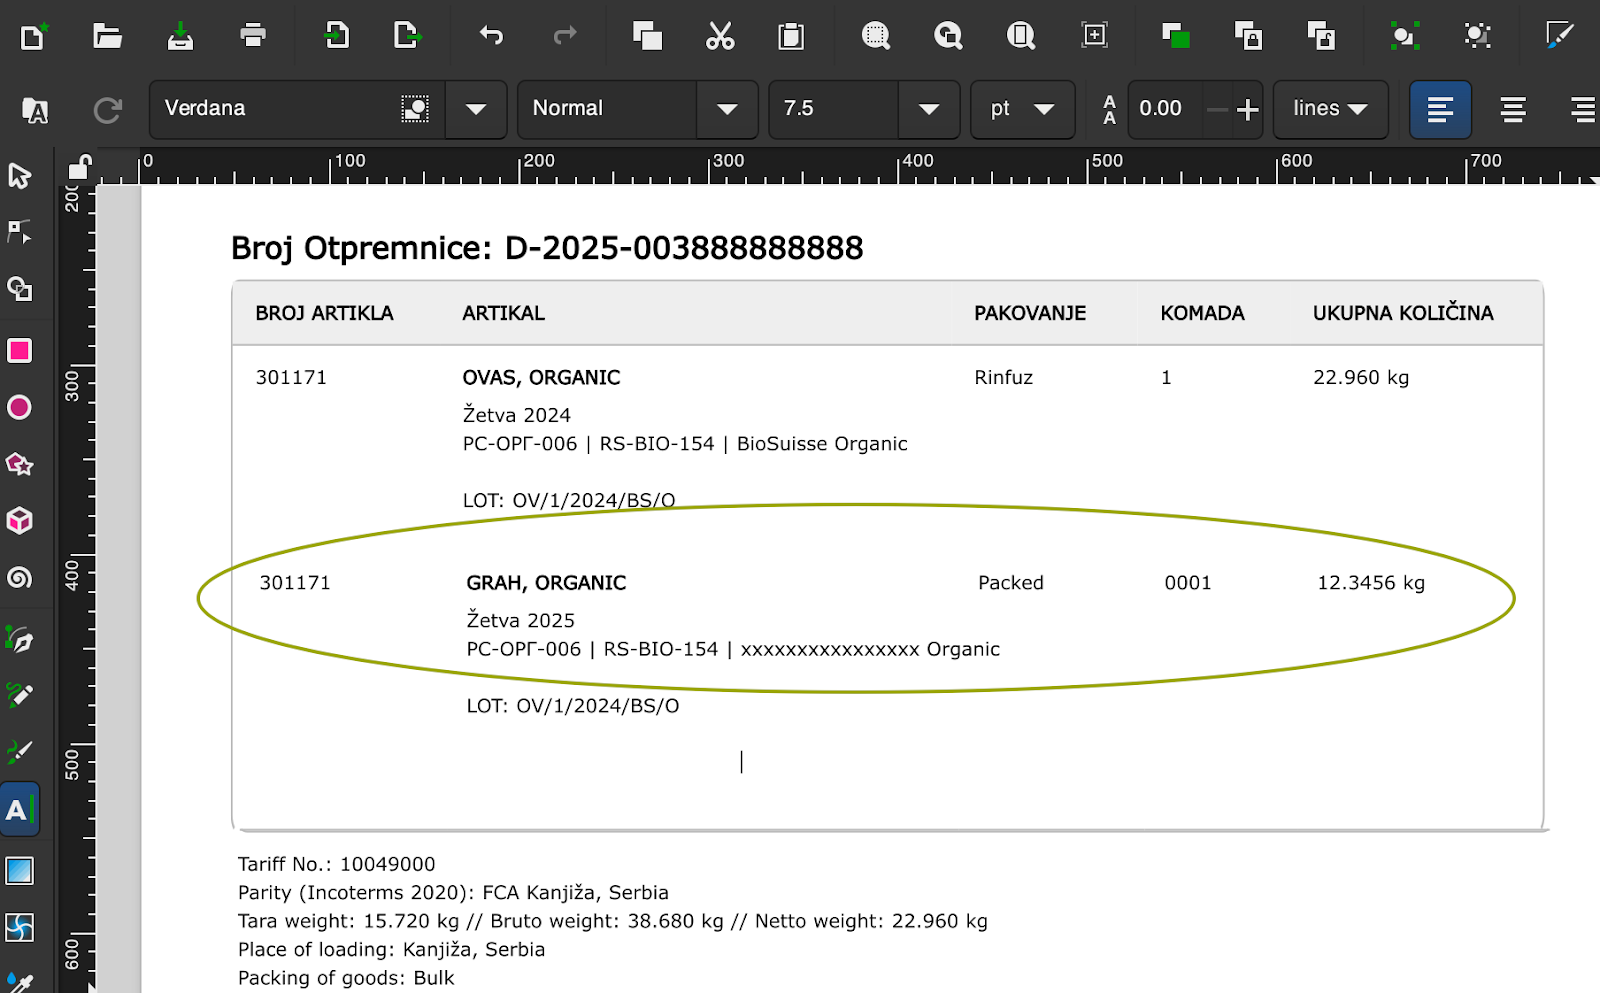
Editing Text in the PDF
Select the Text Tool (symbol: A) from the left toolbar
Click directly on the text you wish to edit
Use Backspace/Delete to erase existing text first
Then type in your new text
Overwriting without deleting existing text first does not work well, therefore it is recommended to clear the text which is to be modified in the box first. When inserting a new text, this is not needed, option overwriting should be available then.
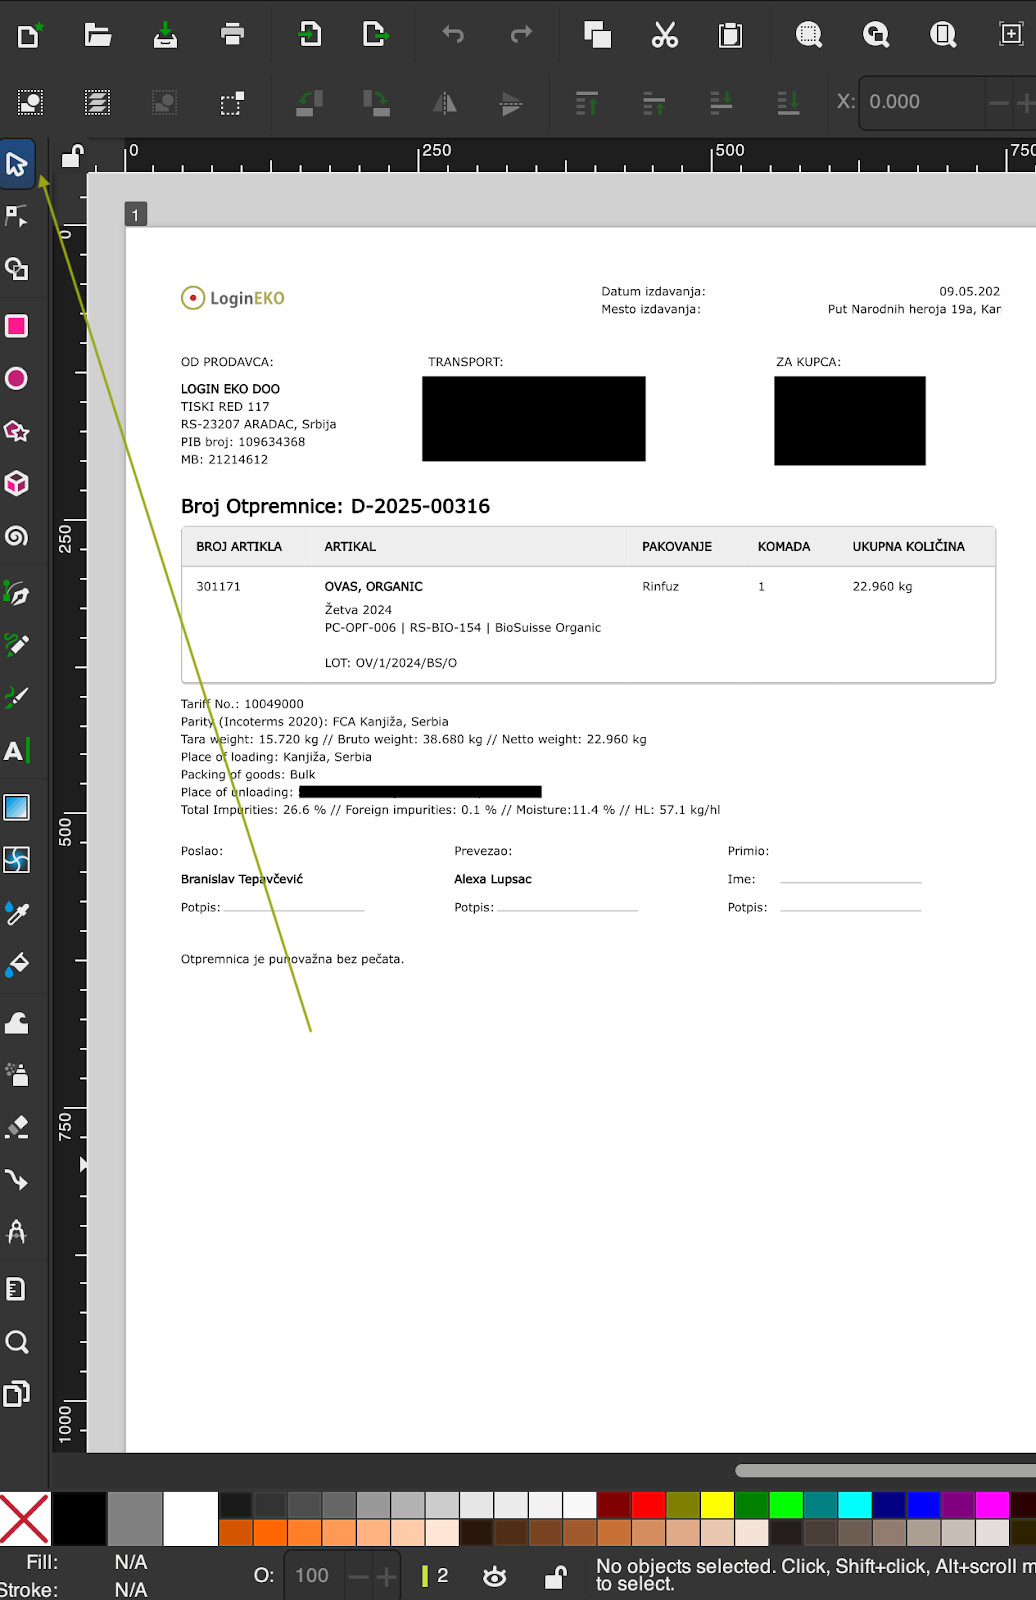
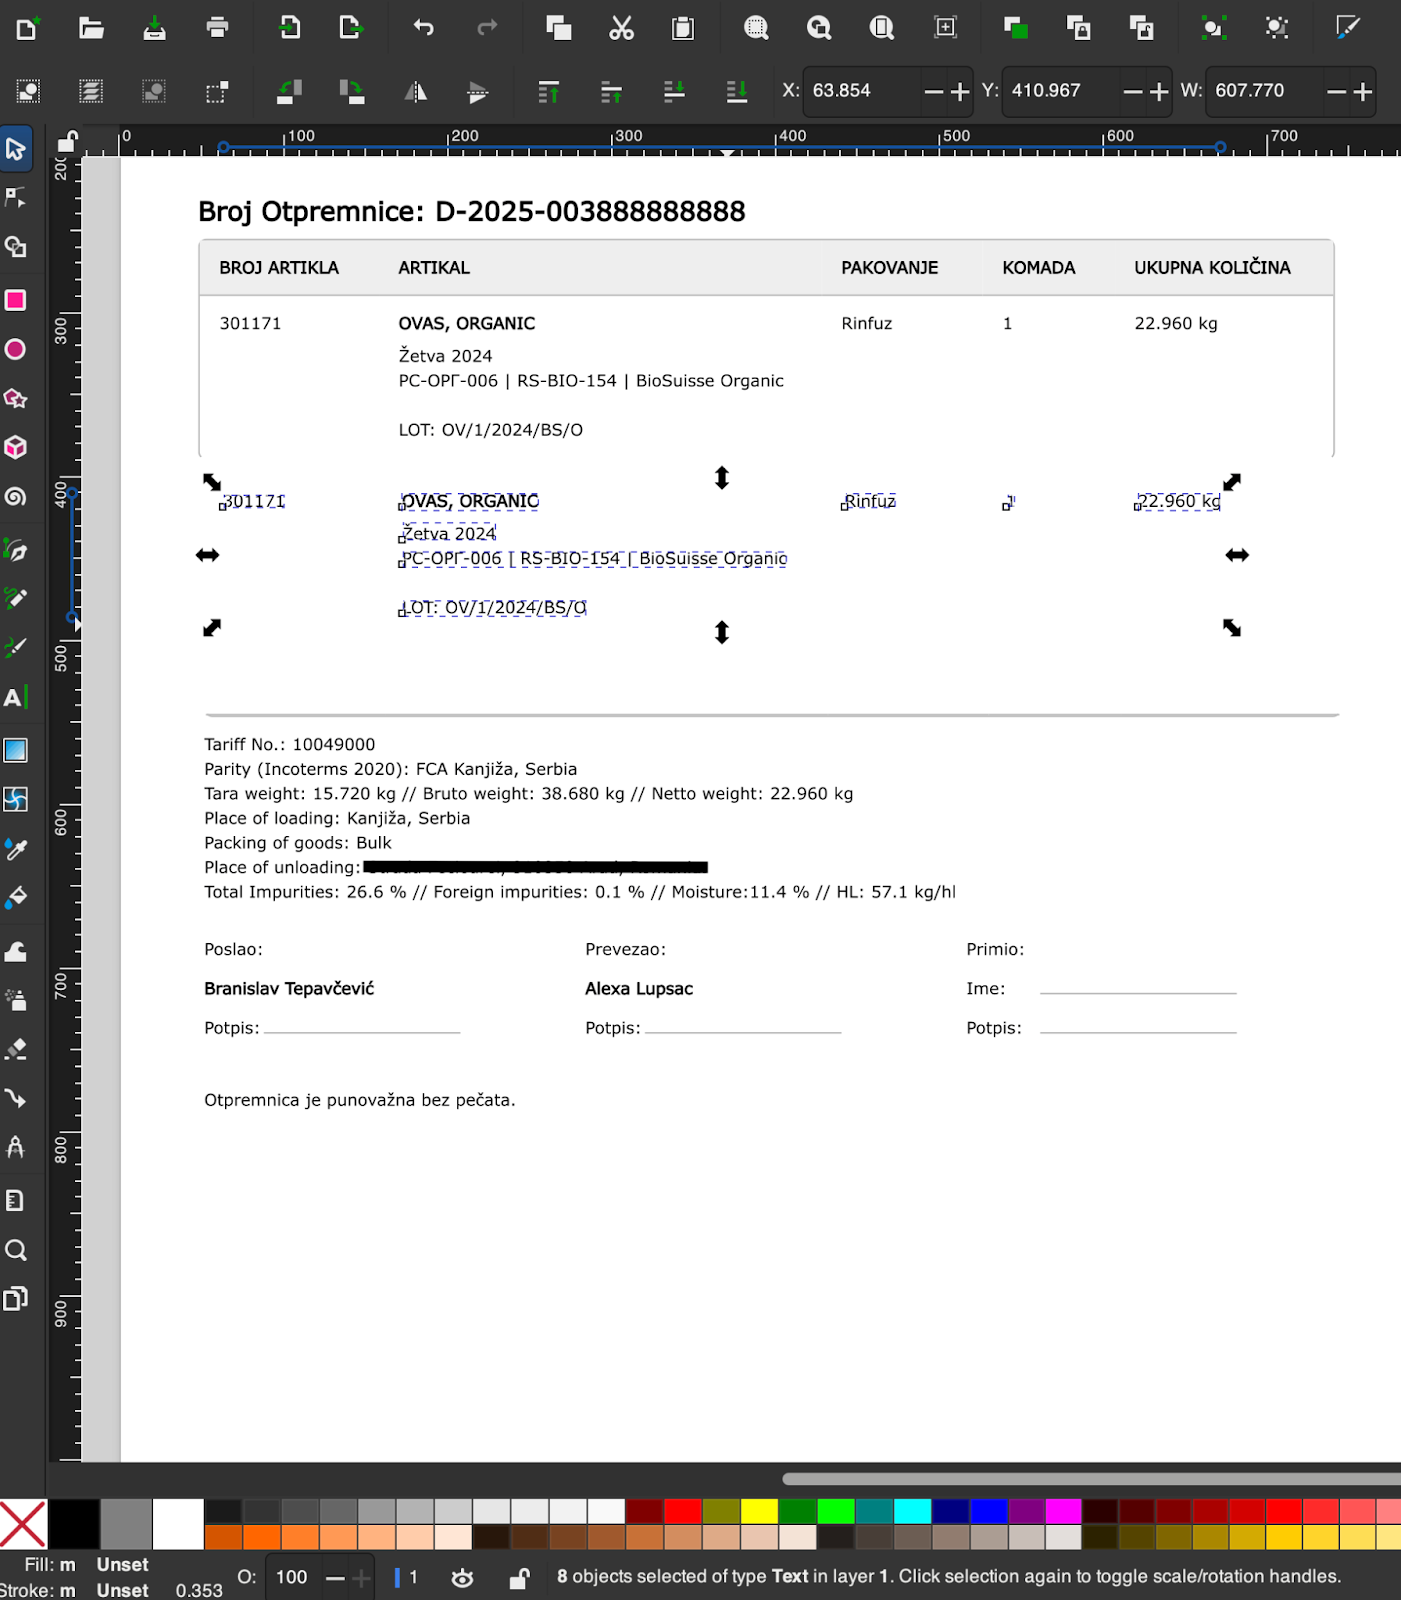
Moving or duplicating Text and Elements
Select the Select Tool (symbol: arrow) from the left toolbar
Click on any object, text or shape
The selected element can then be:
Moved by dragging or using the keyboard arrow buttons
Copied and pasted elsewhere (Ctrl+C / Ctrl+V or Cmd+C / Cmd+V)
Resized using the corner handles
Below are a few examples of how objects can be moved, copied and new ones inserted. Once an object in this case the data under the table of the article is selected, it can be moved by dragging it or using the arrow buttons on the keyboard. In the example below it is moved down to create space for an additional article which needs to be inserted in the table. Afterwards the existing article with its associated data is copied and pasted just below the original one in the second row. The left and right side of the table are redrawn by selecting them and dragging the bottom side of it to meet the bottom line of the table. Finally the Text Editing tool is selected to edit the text of the additional item which was added in the table, overwriting of the newly inserted text is possible, there is no need to delete with backspace until the point where data modification occures.

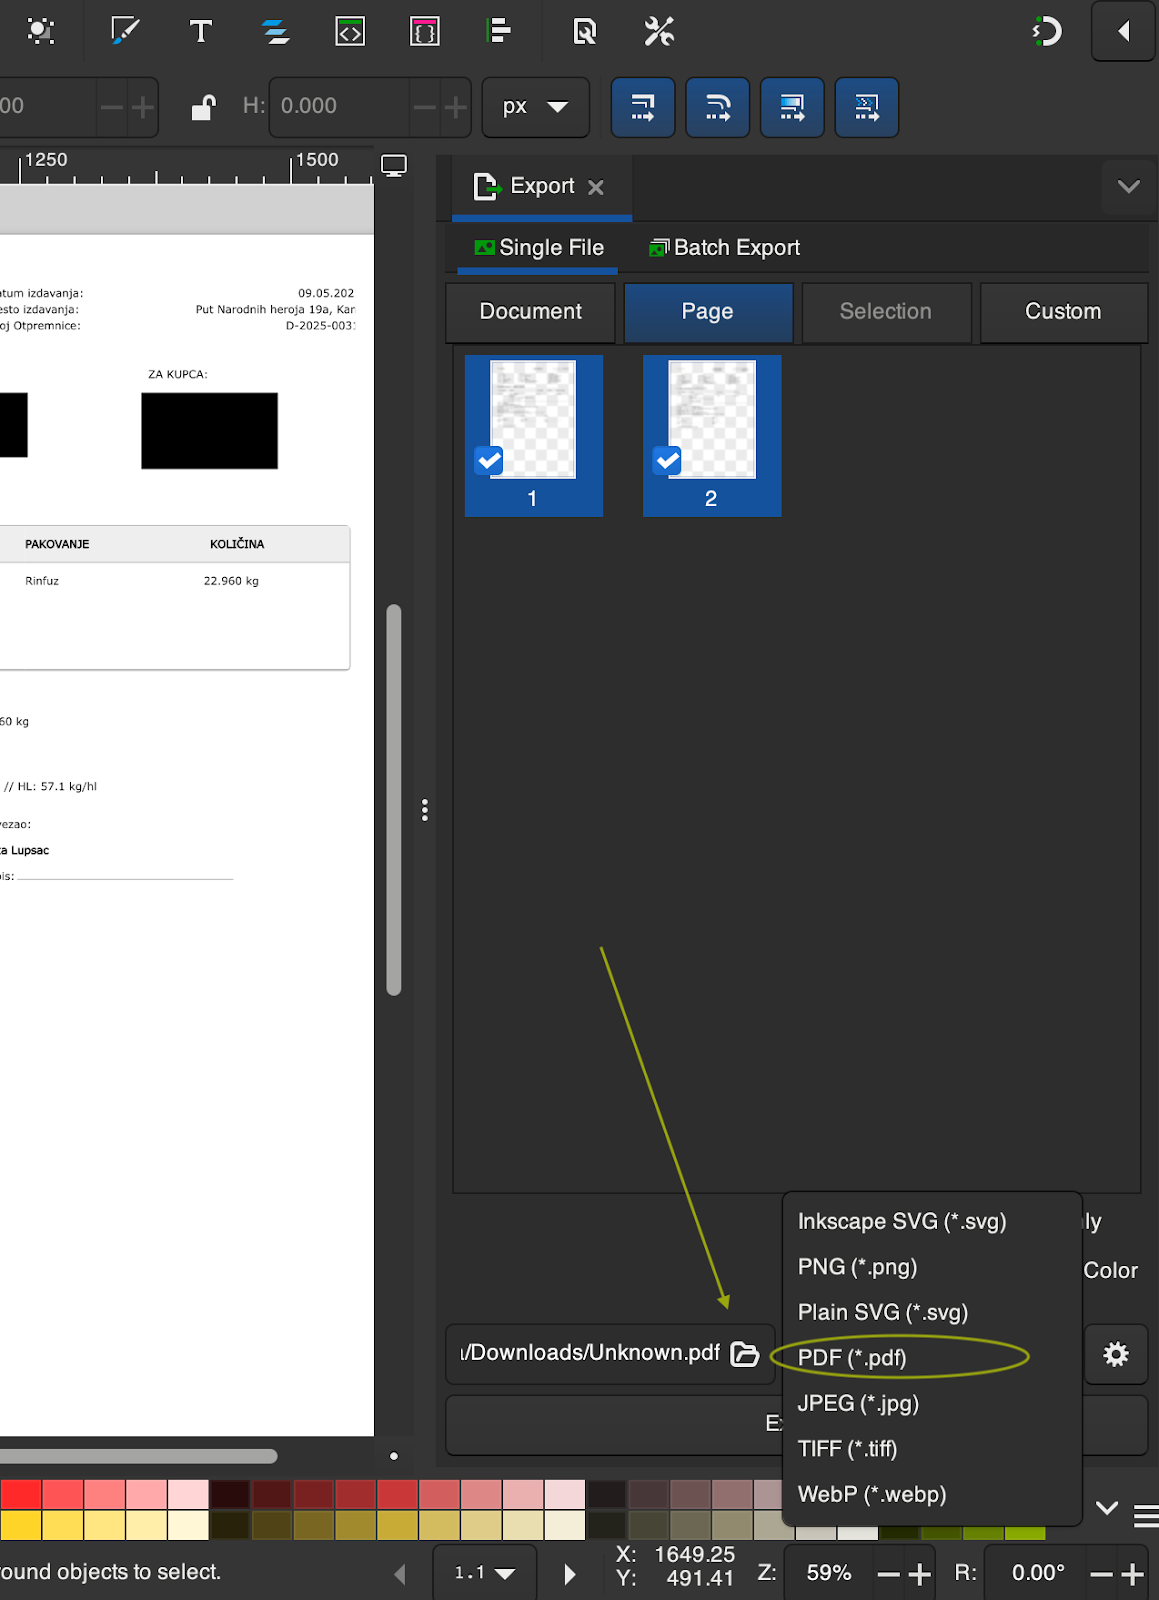
Saving and Exporting Edited PDF
When finished:
Go to File > Save As or File > Save a Copy
Select:
PDF format to keep it in editable form, as well as name and location where the file is to be saved
For final version, use:
File > Export to create a clean PDF with changes (Please note this exported pdf might not be available for re-editing the text in the same manner afterwards, while erasing text and manually inserting is always an option)
Delivering the modified PDF document to the customer
Once the PDF (e.g. delivery note) has been edited as requested, follow these steps to deliver it back to the customer:
Return to the tenant’s support channel where the original request for the document was made (e.g. Freshdesk or direct email).
Locate the original conversation or ticket to ensure you are responding in the correct context.
Upload the modified PDF document as an attachment, ensuring the correct file version is included.
Add a short message confirming that the document has been updated and is ready for use or printing.
Submit or send the response to close the communication loop and make the document immediately accessible to the customer.
This ensures the modified document is delivered promptly to the right place and can be used without delay.
Was this article helpful?
That’s Great!
Thank you for your feedback
Sorry! We couldn't be helpful
Thank you for your feedback
Feedback sent
We appreciate your effort and will try to fix the article